|
|
Post by turbokinetic on Nov 6, 2018 6:11:06 GMT
Hi Folks! Let me introduce the Norge Rollator. This is a 1930's mid size refrigerator built by Norge division of Borg-Warner Corporation. Its claim to fame is it's rotary compressor, the Rollator. It was invented by a Mr. Roloff; and the trademark is based off his name.
I have recently acquired two Rollator refrigerators, one of which will be repaired in this thread and video series. This one is complete and in good shape; however it has a painted cabinet and therefore is less shiny than the porcelain models. It does, however, have a good history. I am the second owner - buying it from the grandson of the original purchaser.
I neglected to take a good picture of it before, and only have this one with a Frigidaire top sitting on top of it. .JPG)
Has a Norge branded Delco motor; and the famous Rollator compressor.
.JPG)
The compressor skid is surprisingly heavy! But it's out....
.JPG)
Lots of years of dust there.
.JPG)
Needs a good cleaning.
.JPG)
Nice little three-blade fan.
.JPG)
The gaskets on the compressor look horrendous!
.JPG)
Off with the motor.... don't want to wash that.
.JPG)
What a difference a little water and soap makes!
.JPG)
Even the wood looks nice.
.JPG)
No wonder the skid was so heavy! That silver color was just silver paint... which is gone now... and not aluminum like it appeared. The compressor is a solid chunk of IRON!
.JPG)
Gaskets rotting out of the compressor....
.JPG)
.JPG)
Compressor off the skid. Now to take it apart.
.JPG)
A new-style seal along with the original. The new seal will require a shaft sleeve. They machined a keyway all the way down the shaft for some reason. That makes this job a lot more time consuming for me. I have to sleeve it to get a smooth non-keyway surface for the seal to ride on.
.JPG)
New type seal fits... too bad about that awful keyway!
.JPG)
Original seal. Not completely shredded but it leaked none the less.
.JPG)
Inside of the bearing housing.
.JPG)
All the bits! This design is simple in theory, however it is actually very complex to execute. It has many very small pins, springs, and other detail parts which would make it a manufacturing nightmare in today's manufacturing facilities.
.JPG)
Nasty SO2 residue.
.JPG)
I have put a lot more time and info into this video than shown above. This compressor is really unique and I want to document its construction to the best of my abilities. Hope you enjoy it and its not too long and boring!
Thanks for your interest in the Norge Rollator repair! Sincerely, David
|
|
|
|
Post by birkie on Nov 6, 2018 13:02:15 GMT
Thanks for taking the time to make that detailed video! I didn't realize that when the seal broke on your frigidaire, it still had its charge of SO2. Good thing this one was almost empty. How do the parts look up close in terms of wear? My three year old's son's opinion: "I don't like this refrigerator". He didn't like the noise and shaking when it was running at the beginning  I hope the float on this one ends up being serviceable |
|
|
|
Post by turbokinetic on Nov 6, 2018 14:29:37 GMT
Thanks for taking the time to make that detailed video! I didn't realize that when the seal broke on your frigidaire, it still had its charge of SO2. Good thing this one was almost empty. How do the parts look up close in terms of wear? My three year old's son's opinion: "I don't like this refrigerator". He didn't like the noise and shaking when it was running at the beginning I hope the float on this one ends up being serviceable Thanks Aaron. Yeah on the Frigidaire, it was the donor unit at Travis's that had some of a charge of SO2 in it. I had an adventure with that one. First the seal breakage and leak during condensing unit removal. Then, after salvaging the unit from the cabinet, I valved in the two lines going into the now-leaky compressor; and capped off the lines with brass caps. I didn't have enough small caps, so I left the small fitting on the evaporator taped over, but without a cap. Apparently there was SO2 dissolved in the oil trapped in the evaporator. It started coming out in my car, and I had to stop and air things out along the way!
The parts actually look quite nice. The inside of the rotor housing, and the external surface of the rotor appear to be in decent shape. There doesn't appear to be any scoring or corrosion at all. I can't tell if the rotor housing is actually nitride; or if it's just got a coating of brown SO2 funk on it. Will sonicate the parts today and see what they look like clean.
Today if I am given time to continue on this project; I will open the evaporator and try to make an assessment of the float. There was a lot of carbon built up in the compressor, so hopefully that doesn't bode too ill for the needle and seat condition. The one which came from the original evaporator in my 31 Frigidaire was in like-new condition. The one in Travis's Frigidaire was in ruins; and the one in the donor unit's evaporator was fair and able to be cleaned up in the lathe without losing too much length - and that one is adjustable so it didn't matter anyway.
I really agree with your son's opinion. I also really didn't like that noise or shaking either! It was awful!  At least he couldn't smell the SO2 through the monitor - or he would have REALLY disliked it! At least he couldn't smell the SO2 through the monitor - or he would have REALLY disliked it!
|
|
|
|
Post by turbokinetic on Nov 7, 2018 4:04:56 GMT
So, I made a little progress on the Norge today.
First thing was to get the evaporator out and see what sort of condition it is in. To that end, I started by removing the front panel from the controls and evaporator. Thankfully, with the help of a heat gun, I was able to get it off without tearing up the rubber.
.JPG)
It seems a little forlorn without the cover LOL!
.JPG)
Control just plugs in.
.JPG)
Made in USA by Cutler-Hammer controls.
.JPG)
Got the control bellows, nicely contained in a shroud, so that it wouldn't over-expand if removed. Also got a 5 amp overload heater with melting alloy trip device. All in great shape in spite of the age.
.JPG)
Now for the ugly. The evaporator was full of black crusty stuff and oil.... lots of oil....
.JPG)
The needle valve. It looks awful here, however the needle its self is in perfect condition. I could have sworn I took a picture, but it's not on the card.
.JPG)
This entire bottle of oil came out! I spilled some as well.
.JPG)
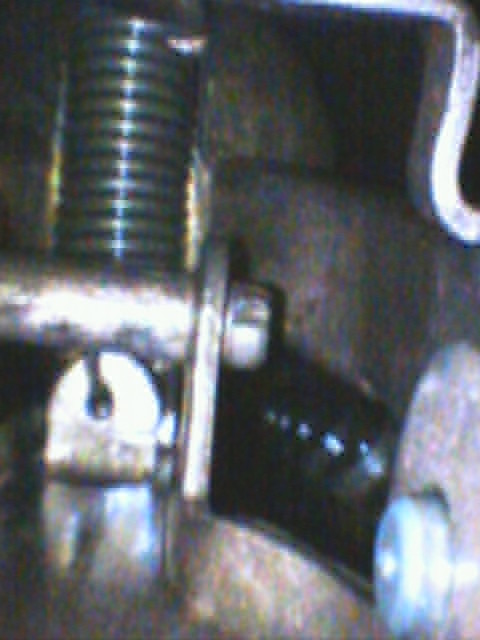
To compensate for the lighter density of R152A, I added a spring to the needle valve pivot area. This takes about half the force from the weight of the float. It is a semi-educated guess. The Frigidaires needed slightly more of the float weight compensated in order to work with R152A. This float is larger, and I expect it to still function. The torsion spring and the silver bushing in the center of the spring are new.
.JPG)
The thimble screen in my hand goes in the liquid inlet port.
.JPG)
I did an internal borescope inspection of the evaporator. Again, the pictures aren't on the SD card. I think the card may need formatting.
As for the compressor, I determined that the shaft will have to be turned down, a sleeve installed, and then the seal can be installed. I didn't have enough sleeve material on hand, and spoiled the one piece I had. So, hopefully tomorrow I can get the eccentric shaft repairs done.
|
|
|
|
Post by birkie on Nov 7, 2018 16:22:15 GMT
I'm kind of shocked at the volume of (disgusting looking) oil in the evaporator. Could it have run, poorly, a long time with a low charge (and therefore, float "open")?
Also, it looks like the float itself is trapped in the header, and the valve mechanism simply has an arm with a slot that mates with the float?
|
|
|
|
Post by turbokinetic on Nov 7, 2018 16:29:43 GMT
I'm kind of shocked at the volume of (disgusting looking) oil in the evaporator. Could it have run, poorly, a long time with a low charge (and therefore, float "open")? Also, it looks like the float itself is trapped in the header, and the valve mechanism simply has an arm with a slot that mates with the float?
Yes I was also really surprised at the amount of oil in there! I believe it did run for a long time wit a very low charge. That is what the Norge manual says causes this to happen, as well.
I took more pictures of the float mechanism and valve etc. but for some reason they weren't on the SD card. The float mechanism has a round cross bar inside the evaporator header, which goes into the slot at the end of the valve arm.
Thankfully the needle and seat were in very good shape! Those were lost pictures, unfortunately.
|
|
|
|
Post by turbokinetic on Nov 8, 2018 7:47:57 GMT
Hey folks, got some pictures and a video on the Norge Rollator fridge!
First, the shaft had to be repaired. The keyway needed to go away. I had to turn away the entire tapered section of the shaft where the flywheel attaches. Then, a seal journal was bonded to the shaft; and turned to size and polished. To make up for the loss of the flywheel taper, a tapered shim; similar to a collet, was used. .JPG)
All the parts cleaned up and stored in a clean box.
.JPG)
.JPG)
The compressor dome, and the housing cleaned with Zep Purple Degreaser, and then glass bead blasted afterwards.
.JPG)
The working parts going in....
.JPG)
Looking almost ready to work! .JPG)
New seal holder going in.
.JPG)
New seal installed.
.JPG)
.JPG)
And the flywheel on...
.JPG)
Another long video, of me clumsily assembling the compressor! |
|
|
|
Post by turbokinetic on Nov 8, 2018 15:11:38 GMT
So, last night I waited to post this until YouTube showed the video was available. Then this morning, I had an e-mail about a non-working video, and found that YouTube had regressed the video from "available" to "processing" and "This video is private." Strange and I apologize for the corrupt video. It is working now.
|
|
|
|
Post by elec573 on Nov 9, 2018 4:18:40 GMT
Nice job with the new seals it’s probably better than new !
It amazing to me how your able to come up with fixes with old parts . They seem like they are better than the original parts .
|
|
|
|
Post by turbokinetic on Nov 9, 2018 4:34:01 GMT
So, today was busy for me and I only got a few things done on the Norge.
Got the compressor dome installed. I tried making a fiber gasket out of the same material as the headgaskets for the Frigidaire recip compressors. Unfortunately, it leaked horribly. I think the fiber material was too thin, and also the machined surfaces on the compressor are grooved. I think the original gasket must have been a special compound which would mash into the grooves and seal in them. The thin, hard fiber didn't work. In the end, I used Permatex Right Stuff.
.JPG)
Now it holds vacuum!
.JPG)
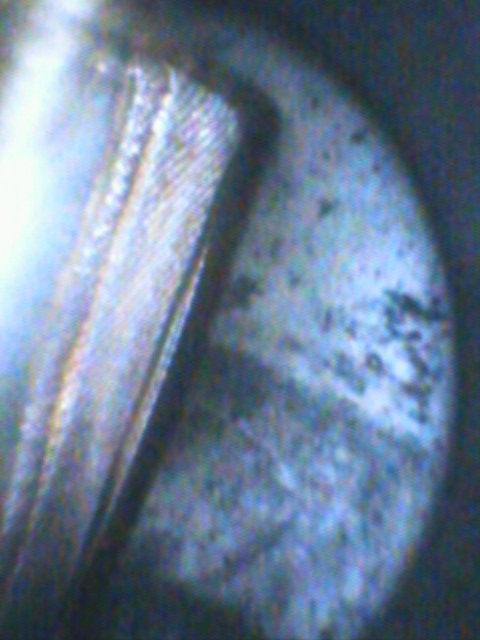
I took some more pictures of the inside of the evaporator using a Harbor Freight borescope. Quality not so stellar, but you can get the picture that it's not too filthy after cleaning with degreaser.
 \ \
This is the return tube. The small cup at the end is the oil wicking device. See the metal mesh wicks on the side of it?

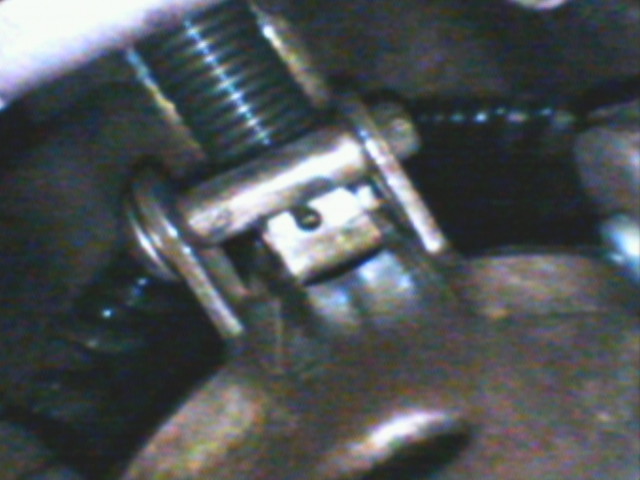
This cross-bar is the part of the float which connects to the needle valve.
|
|
|
|
Post by ckfan on Nov 9, 2018 5:13:32 GMT
Seeing you assemble this compressor really makes me appreciate just how well built they were. Very precise machining. Makes sense though. The meter misers were built with the same level of precise machining. I can also see why this would be an expensive machine to produce. Very neat stuff. Seeing inside of the evaporator is cool too. So the screen helps shoot the oil back to the compressor? I’m a little confused about that.
|
|
|
|
Post by turbokinetic on Nov 9, 2018 6:15:39 GMT
Nice job with the new seals it’s probably better than new ! It amazing to me how your able to come up with fixes with old parts . They seem like they are better than the original parts . Thanks! I am accustomed to designing ways to apply new equipment, as well as having no money as a young person and having to learn how to keep things going. It's just the way I think - apply something I have seen work well before, in a similar application. I think the modern seal will be a good fix. They last 10+ years in automotive applications, with a lot higher RPM, pressure, and temperature abuse. Seeing you assemble this compressor really makes me appreciate just how well built they were. Very precise machining. Makes sense though. The meter misers were built with the same level of precise machining. I can also see why this would be an expensive machine to produce. Very neat stuff. Seeing inside of the evaporator is cool too. So the screen helps shoot the oil back to the compressor? I’m a little confused about that.
It is really precise. Nothing will fit together unless it's perfectly aligned. Even with just a coating of oil (not a constant supply) it has good compression... and that's after 80 years of use and abuse!
The materials are incredibly hard, as well. The shaft required a special carbide insert lathe tool. I tried with a cheaper carbide tool, and it would not produce an acceptable roundness or surface finish. The tool which finally did the job was a very keen, small pointed tool which just shaved a tiny sliver off at a time. It took quite a while to get that shaft trued up.
The oil wick is interesting for sure. It is supposed to "soak" the oil from the surface of the refrigerant and allow it to transfer over the top of the return cup, via capillary action. From there the suction of the return like will take it back to the compressor. It looks iffy at best to me. However, Frigidaire has noting at all in the evaporator for this feature, and they seem to work well without it. My 31 Frigidare has been in operation for several months now and it has not seemed to have any lost performance which could be due to oil logging in the evaporator. Travis's 1928 model is also working well and has not seemed to change at all since its first startup. I am using the same refrigerant and oil combination in the Norge. It should work even if the oil wicks are not doing anything, assuming the same dynamics are at play as in the Frigidiare evaporator.
If I have time, I may post a page from the Norge manual about the oil wicks tomorrow.
|
|
|
|
Post by elec573 on Nov 10, 2018 3:14:44 GMT
Very nice thanks for the updates like seeing your rebuilds ! It’s nice to see these old fridges brought back to life!
|
|
|
|
Post by turbokinetic on Nov 10, 2018 6:43:57 GMT
Very nice thanks for the updates like seeing your rebuilds ! It’s nice to see these old fridges brought back to life!
Thanks! I enjoy the challenge as well. They will of course be higher maintenance than a hermetic unit; however that's just part of the way they were back in the day.
Today I opened up the motor and cleaned all the parts. The rotor is very heavy. I'm sure this is to help with smoothness of the unit by adding flywheel mass. The winding is in good shape. It's hard to kill a Delco motor!
.JPG)
Next, the start capacitor needed to be replaced. It was leaking and these "sardine can" capacitors are a very familiar failure point for the antique fans I also work on. That has to go.
.JPG)
It is an Aerovox, and still works. It just has some leakage on it.
.JPG)
Aerovox capacitor nameplate built into a rupture disc. This would pop open at the center before the capacitor could built up enough pressure to explode. Don't want anyone to lose an eye!
.JPG)
Gutted the capacitor and put a new Aervox cap in the housing.
.JPG)
Packed it with foam to ensure the cap doesn't move around and break.
.JPG)
Looks legit!
.JPG)
Motor leads re-insulated with heat shrink and new cap installed.
.JPG)
Motor is back on the unit! The compressor does work, as well.
.JPG)
View of the assembly. I have a sight glass there, since we don't have a documented correct charge amount for this machine, running anything other than SO2.
.JPG)
Painted the compressor aluminum silver like it was from the factory.
.JPG)
.JPG)
.JPG)
.JPG)
.JPG)
And a short video!
|
|
|
|
Post by ckfan on Nov 10, 2018 22:40:11 GMT
That whole compressor skid looks gorgeous now! I really like how it all looks. It also sounds nice and smooth. I know it will be even better once you get a better belt on it.
|
|


 At least he couldn't smell the SO2 through the monitor - or he would have REALLY disliked it!

