

Post by turbokinetic on Mar 26, 2019 6:10:33 GMT
So, thanks to Paul (csulaguy) I acquired two nonworking CA-2-B16 cooling units. One of them was seized and the other ran but had poor cooling efficiency. It seemed so-so when we first got it going, and in the heat of the moment happiness, didn't realize it was very weak. While working on another identical CA unit, it was apparent that it had orders of magnitude greater cooling than the one which is the subject of this thread.
The symptoms were as follows when started from ambient temp, after crankcase heater was on overnight:
-Immediate excessive burbling and blowing sound from evaporator. Similar to blowing bubbles in a drink with a straw.
-Long time to develop frost (20 - 30 minutes).
-Frost was not hard, could easily wipe off with hand.
-Would not get cold enough to cycle the control off.
-Low heat at condenser and dome.
There was some rattle from the compressor, which I am not completely sure is resulting from this problem. In an attempt to address the rattle, I added some oil to the unit, however it did not make a difference in the sound or the cooling.
The oil filling job. That funnel had been heated up on the end, and forced over the service port to make a tight fit.
.JPG)
Thanks to our fine group of enthusiasts here, lots of information is available on the float valve and capillary tube conversions. I read through Allan and Cablehack's write-ups; and purchased a roll of capillary tube and some fittings today. This was to be my Plan B if I was not able to repair the float valve.
Remember I tore down a burned out CA last year, and took apart the float? The seat assembly was still here, showing severe wear. The orifice was oblong and jagged. The needle tip, however, was still pristine. Using the seat from this machine, I experimented with methods to re-cut the orifice.
This is the seat orifice from the burnout machine, cut off so it's visible. See how deformed it is?
.JPG)
The next step was to chose a cutter tool. I scoured the shelves at Harbor Freight Tools; and found an assortment of diamond abrasive grinding points. One of them was just perfect for this. The re-cut seat:
.JPG)
NOTE WELL!!!! This was done with the unit charged, but inerted with nitrogen on top of the methyl formate charge. I connected the service kit and used nitrogen to "break" the vacuum and prevent air from going in and mixing with the methyl formate. This would prevent creating an explosive mixture inside the system. The pictures below are of the actual machine being repaired.
Referring to Cablehack's description of the best place to cut, I cleaned up and prepared to cut the seat off the bottom of the float chamber. I did all the cleaning before opening the system to minimize charge loss and contamination.
.JPG)
Tubing cutter in action...
.JPG)
Seat separated from the float needle.
.JPG)
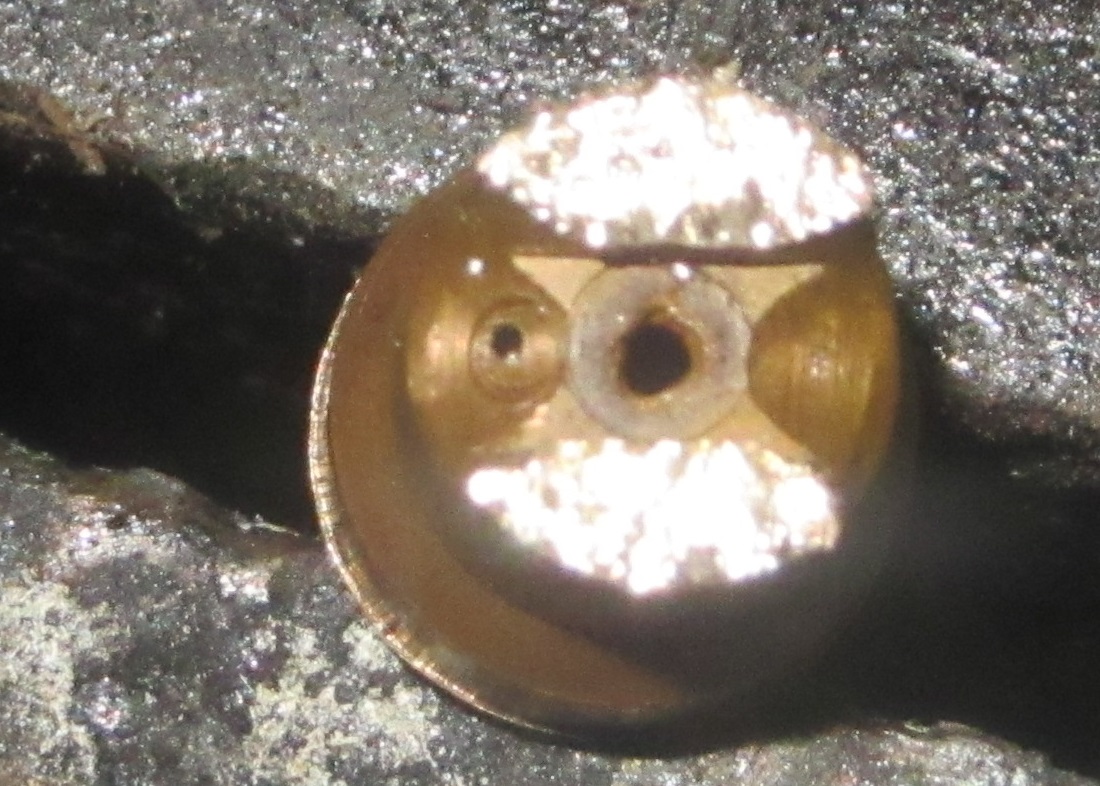
It's hard to get the camera to focus on the seat orifice. It's "way down in there" and the flash and auto-focus just don't work well.
Looks pretty raunchy.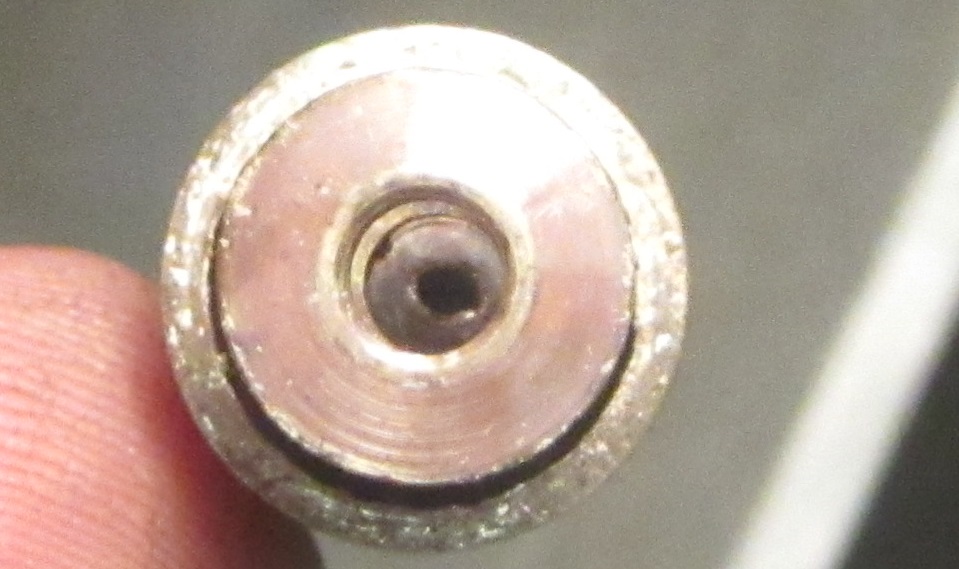
.JPG)
Next, the cutting tool gets used. It is a very fine cutting tool. There will be some fine brass dust from this, which some may enter the system. I could have cut the line below the seat and made more attempt to clean it, but in the condition of this unit, it didn't seem necessary. If it were someone else's machine I would have taken more precautions. Although, I doubt that the resulting debris will have any significant effect on the unit.
.JPG)
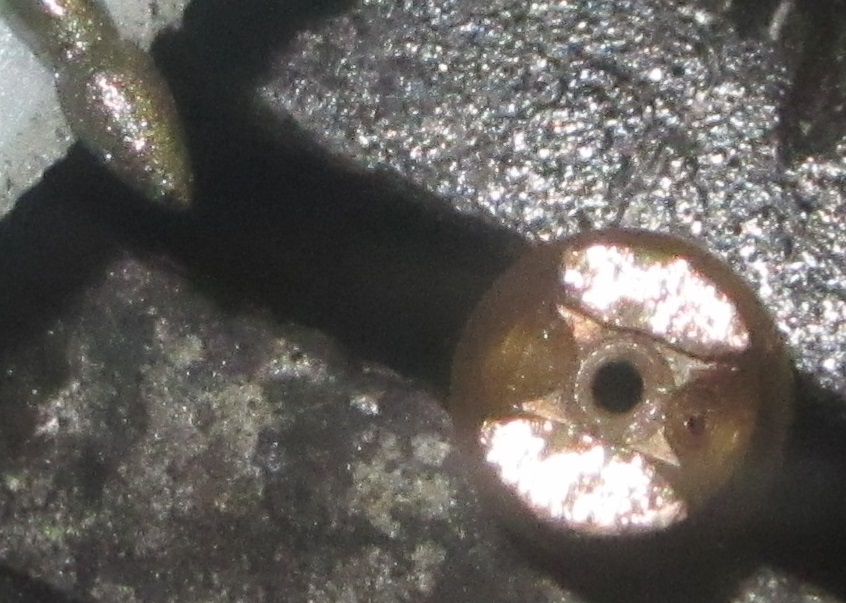
The needle guide is a perfect guide for the cutter shank. It runs true.
.JPG)
Looks a lot rounder..JPG)
.JPG)
I placed a half-length 1/2" tube coupler on the cut float chamber tube. This will re-join the two halves. The small ring is the piece of tube which I removed. The float needle must actually reach the seat. I discovered that even before cutting the seat, the needle would not reach the seat. I think this was due to wearing of the seat, allowing the needle to recede. After removing that amount of tube, I could pull the needle out by hand, and then when the seat was placed back into position, I could feel the needle being pushed back up when the seat hit it..JPG)
Not wanting to put too much heat on things, I used Stay-Brite 6 and liquid flux to solder the coupling in place..JPG)
And, after a lot of purging NCG's out of the system, it has a crisp, hard frost line without any strange noises. Even without a cabinet, it cooled down and cycled off on the control..JPG)
Note that the bottom of the evaporator had water in it from a hot water bag. That isn't white frost, but it is solid ice..JPG)
The unit didn't want to work when I first started it up. I have a feeling that the heater having been off during the repairs, along with the manually added NCG's (the nitrogen); it was not circulating. I had to purge it quite a lot before it started flowing refrigerant into the evaporator. It had me worried that I had blocked the system somehow. I'll be interested to see how it does tomorrow when started up. I have the heater on overnight, as well as the NCG purging is already done.
Hope you found this interesting. It actually took about 30 minutes to do the repair; not including the NCG purge.
Sincerely,
David


.JPG)
.JPG)
.JPG)
.JPG)
.JPG)
.JPG)

