|
|
Post by ajc31980 on Jun 30, 2018 9:01:34 GMT
That looks like a winner! It would be good to cut the plastic off your ports or have someone else confirm this since I haven't worked on your model and can't see the fittings.
Unfortunately, that set of gauges is only for automotive R134A fittings. In this country there are some politically motivated engineering designs around air conditioning. The automotive gauges use the Acme threaded fitting. You can often get gauge sets made overseas, where politics play less of a factor, that will have adapters to use with both designs.
This set of gauges has the SAE flare fittings built in, and comes with the Acme adapter for R134A and the automotive quick couplers as well. You could use it with virtually all refrigerant systems. www.amazon.com/OrionMotorTech-Diagnostic-Manifold-Refrigerants-Couplers/dp/B019W5LIVS/
That is a winner! It has both the automotive Acme and the rest-of-the-planet SAE flare fittings. See the tee piece where the hoses connect? Just keep a cap on the one you aren't using. That would work, but it's married to only the small cans of R12 and can't do R134A nor can it do R152A cans. The side tapper is a much better option. This one linked here has the ability to do R12 (or R152A - the cans are same size) as well as R134A cans. www.amazon.com/Enviro-Safe-5020-R-134a-Refrigerant-Punch/dp/B01DUUP4KC
The one you linked below may be similar, but that link isn't working for me.
Hope this helps! Sincerely, David
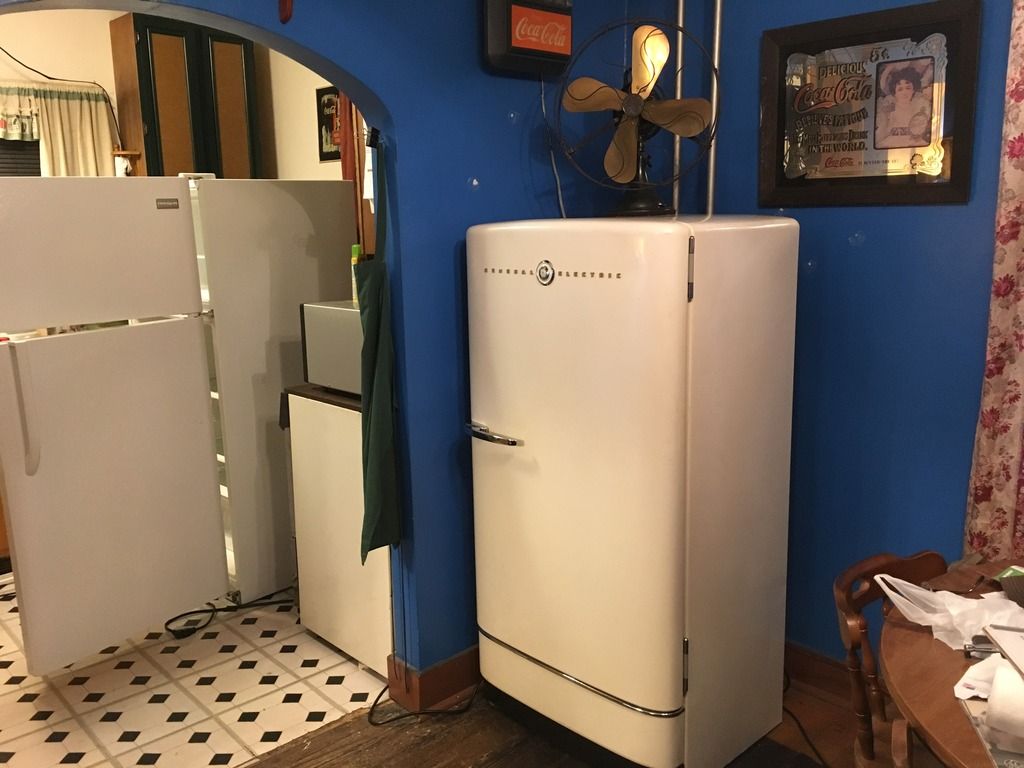
Thank you for going over my list ! :-) I did get the plastic removed from the ports. There’s a bolt? screwed into them I’m thinking I’ve seen it’s ok to remove that bolt. But I’m not going to do so until someone confirms it . I don’t think I’ve mentioned it . But the fridge is sitting in my dinner room. I have a rather small kitchen and found that life is easier if I keep the refrigerator just inside the door way between the kitchen and dining room. So technically have two refrigerators in my dining room right now LOL. I don’t have the kind of basement that’s suitable for working on much of anything LOL. So I don’t really want to accidentally fill my dining room with Freon. I do have a old school 20 inch window fan running in exhaust mode all summer long pulling air through the house . So not like I would get gassed out. But still. Haha. 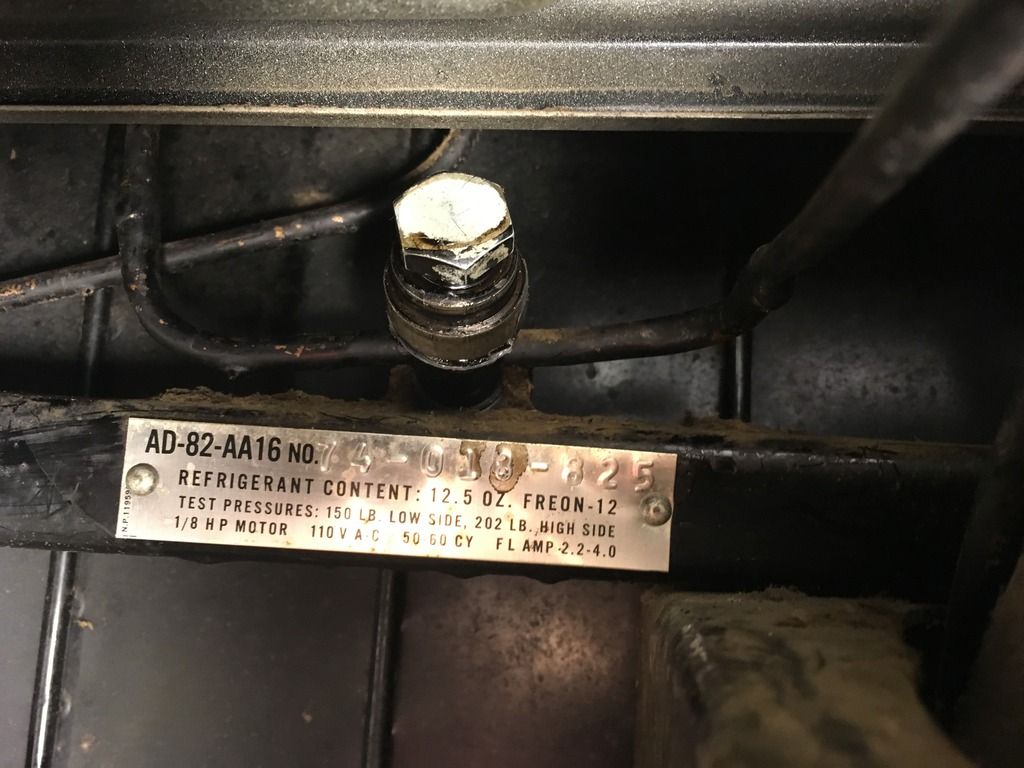 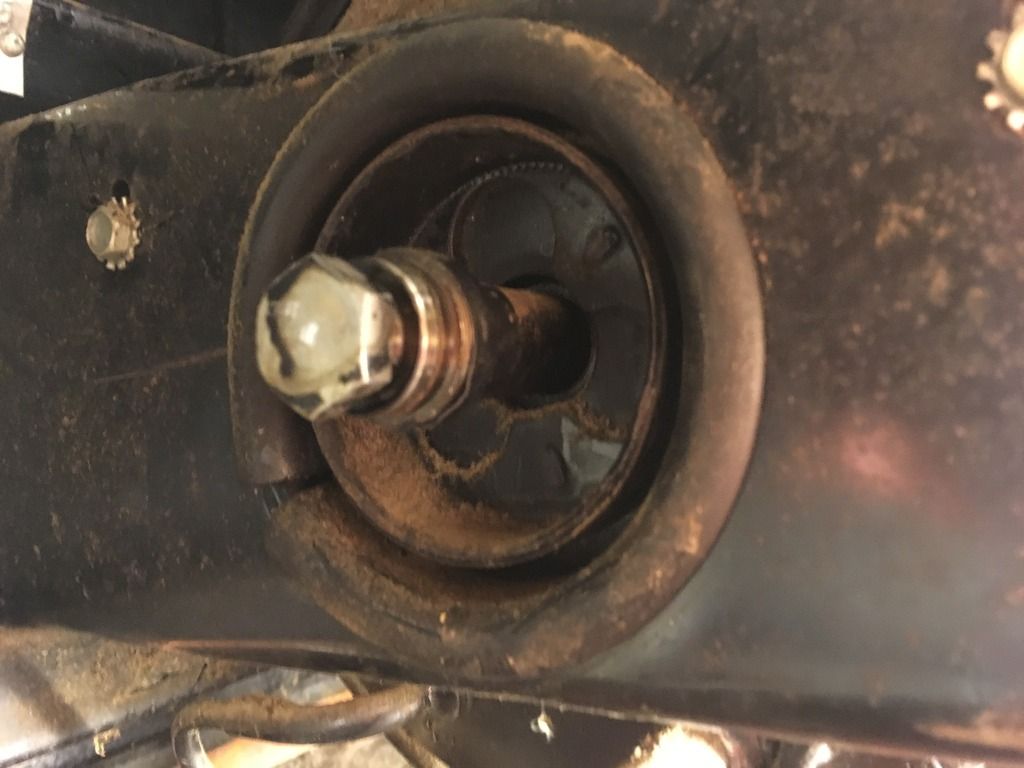 Also I’ve been looking at different cans of R12 on eBay. I’ve seen some listed as pure or virgin and others listed as oil charge . Which kind do I want ? Does it make a difference? Thanks AJ Oh. Which one is the upper side ? And lower side ? I seem to keep getting that mixed up. Ones on the compressor and the other is on the line going to the condenser. |
|
|
|
Post by turbokinetic on Jun 30, 2018 13:34:00 GMT
Oh,wow - those ports are not the same style as the CK. Not sure that hermetic kit is what you need. Hope someone else who has worked with this model refrigerator can comment! It may be that the bolt you see is just a secondary sealing plug, like the screw over the port on a CG ball-top fridge. It's hard to get an ides of scale of the sizes in the picture. The kit may have the adapter which fits in place of the bolt, allowing access. I don't want to guess and tell you something wrong so again hope someone who has actually used it on this model can help!
As for the high and low side - the high pressure service port will be on the line going to the condenser. The low pressure port will be on the compressor.
The R-12 oil charges are just that - a can of oil that's pressurized to be injected through the gauge ports. You would need the regular cans of just pure R-12. |
|
|
|
Post by Travis on Jun 30, 2018 16:50:19 GMT
The purge screw is under the hex bolt.
|
|
|
|
Post by ajc31980 on Jun 30, 2018 16:58:09 GMT
Oh,wow - those ports are not the same style as the CK. Not sure that hermetic kit is what you need. Hope someone else who has worked with this model refrigerator can comment! It may be that the bolt you see is just a secondary sealing plug, like the screw over the port on a CG ball-top fridge. It's hard to get an ides of scale of the sizes in the picture. The kit may have the adapter which fits in place of the bolt, allowing access. I don't want to guess and tell you something wrong so again hope someone who has actually used it on this model can help!
As for the high and low side - the high pressure service port will be on the line going to the condenser. The low pressure port will be on the compressor.
The R-12 oil charges are just that - a can of oil that's pressurized to be injected through the gauge ports. You would need the regular cans of just pure R-12. Ok thanks for clearing up the 2 different cans . I wasn’t sure if one was an oil mix of R12 it just the oil. |
|
|
|
Post by ajc31980 on Jun 30, 2018 16:59:46 GMT
The purge screw is under the hex bolt. Thanks Travis I’ll Remove that hex bolt and see what kind kind of screw is under it. |
|
|
|
Post by turbokinetic on Jun 30, 2018 17:04:44 GMT
The purge screw is under the hex bolt. Thanks Travis I’ll Remove that hex bolt and see what kind kind of screw is under it. Hi Travis, do you happen to know the size of the threads on that bolt? I looked through my hermetic service kit, and it seems there is one adapter with a 1/2" threaded boss which may fit in place of the bolt, allowing access to the system.
Be careful not to twist the lines removing that bolt. It looks like it might be pretty tight in there. Is there a way to use a backup wrench?
Also, you shouldn't need to open the high-side port unless things get really bad. I would work on the low side port.
|
|
|
|
Post by ajc31980 on Jun 30, 2018 17:26:38 GMT
Thanks Travis I’ll Remove that hex bolt and see what kind kind of screw is under it. Hi Travis, do you happen to know the size of the threads on that bolt? I looked through my hermetic service kit, and it seems there is one adapter with a 1/2" threaded boss which may fit in place of the bolt, allowing access to the system.
Be careful not to twist the lines removing that bolt. It looks like it might be pretty tight in there. Is there a way to use a backup wrench?
Also, you shouldn't need to open the high-side port unless things get really bad. I would work on the low side port.
Trust me. I’ll be cautious when I remove them. I don’t have a back up wrench. But I’ll figure something out for that tight space. Just like getting the screws out for that back plate with out removing the condenser haha. That was definitely a tight spot I’ll upload pics in a little wile |
|
|
|
Post by ajc31980 on Jun 30, 2018 18:48:19 GMT
Hi Travis, do you happen to know the size of the threads on that bolt? I looked through my hermetic service kit, and it seems there is one adapter with a 1/2" threaded boss which may fit in place of the bolt, allowing access to the system.
Be careful not to twist the lines removing that bolt. It looks like it might be pretty tight in there. Is there a way to use a backup wrench?
Also, you shouldn't need to open the high-side port unless things get really bad. I would work on the low side port.
Trust me. I’ll be cautious when I remove them. I don’t have a back up wrench. But I’ll figure something out for that tight space. Just like getting the screws out for that back plate with out removing the condenser haha. That was definitely a tight spot I’ll upload pics in a little wile Port pics ! :-) surprisingly the bolts came out really easy.       If anyone needs to see more pics I’ll be glad to take some more. Thanks AJ. |
|
|
|
Post by turbokinetic on Jun 30, 2018 19:41:37 GMT
Trust me. I’ll be cautious when I remove them. I don’t have a back up wrench. But I’ll figure something out for that tight space. Just like getting the screws out for that back plate with out removing the condenser haha. That was definitely a tight spot I’ll upload pics in a little wile Port pics ! :-) surprisingly the bolts came out really easy. If anyone needs to see more pics I’ll be glad to take some more. Thanks AJ. That looks about like the "8" adapter from my hermetic service kit, with the Bristol spline valve plug inside there.
Looking like you're moving along nicely getting this fridge on the road to recovery!
|
|
|
|
Post by 100yearfridge on Jul 1, 2018 21:01:04 GMT
Looks the same as Kevin's FB. About the same year, 47/48. His compressor didn't have the added cooling fins and had an active condenser underneath. It turned out to have a leak on the header at the suction line. Silver soldered.
That fridge you got there is a beauty! Whether or not you get it fixed until I get back to Pennsylvania, we should get together; I'd love to see it up close. Good luck!
|
|
|
|
Post by ajc31980 on Jul 1, 2018 21:17:25 GMT
Looks the same as Kevin's FB. About the same year, 47/48. His compressor didn't have the added cooling fins and had an active condenser underneath. It turned out to have a leak on the header at the suction line. Silver soldered. That fridge you got there is a beauty! Whether or not you get it fixed until I get back to Pennsylvania, we should get together; I'd love to see it up close. Good luck! Hi. Yeah I know that suction line as well as the others do look a little Suspicious where they connect in the evaporator. But for life of me I can’t track down a leak. I have all of my supplies ordered and hopefully I’ll have everything by the end of the week. Wish me luck ! Lol. You’d be welcome to come and see it. I have a lot of vintage stuff here that mite be fun for you to check out as well. It’s rare for me to have company that I can talk shop with, so to speak :-). Thanks AJ |
|
|
|
Post by 100yearfridge on Jul 1, 2018 21:44:28 GMT
So, Kevin's leak was quite small, I feel. I didn't have a halocarbon tester, and I soaped everything with nary a bubble. I do have a hydrocarbon sniffer though, so after I pulled what was left of the r12 out, I put a little shot of propane in the machine, then added nitrogen to maybe 50 to 100 psi. In a very calm room with no air currents (I did this on a very hot day, so I was miserable), I slowly cranked the sensitivity up until I found the leak. Had to keep in mind that propane is heavier than air, so it falls from the leak; kind of like finding a leak in the roof be seeing where your head gets wet! It also can get "filled" in the cup of the sniffer, so I would periodically "dump it out" in fresh air. Propane also collects in divets and low flat areas, giving false readings. It was amazing how sensitive a cheap Chinese sniffer was. If you try this method, try not to burp of fart!
You could also leave a little r12 and charge it up with nitrogen too.
|
|
|
|
Post by ajc31980 on Jul 1, 2018 22:08:42 GMT
So, Kevin's leak was quite small, I feel. I didn't have a halocarbon tester, and I soaped everything with nary a bubble. I do have a hydrocarbon sniffer though, so after I pulled what was left of the r12 out, I put a little shot of propane in the machine, then added nitrogen to maybe 50 to 100 psi. In a very calm room with no air currents (I did this on a very hot day, so I was miserable), I slowly cranked the sensitivity up until I found the leak. Had to keep in mind that propane is heavier than air, so it falls from the leak; kind of like finding a leak in the roof be seeing where your head gets wet! It also can get "filled" in the cup of the sniffer, so I would periodically "dump it out" in fresh air. Propane also collects in divets and low flat areas, giving false readings. It was amazing how sensitive a cheap Chinese sniffer was. If you try this method, try not to burp of fart! You could also leave a little r12 and charge it up with nitrogen too. I did get a detector, and it has gone off around the evaporator a few times I just can’t pinpoint exactly where it’s leaking. I tried moving closer and resetting as I go. After airing out the box really well. It takes the better part of day for the sensor to pick anything up. And it’s pretty faint. It must be a very small, slow leak. I’ve been thinking that maybe it’ll be easier to find after I add some R12 to the system. I guess time will tell haha. |
|
|
|
Post by 100yearfridge on Jul 1, 2018 22:23:06 GMT
I'm not sure if any of the other members would agree, but the added nitrogen (after most of the r12 has been removed), helps bump the pressure up and force the refrigerant through small, hard to find leaks. Of course you don't want crazy high pressures or you could rupture something. Maybe it's so small that it can't be found. I only recommend this method if you're troubles occur again in a few weeks time after charging to proper operation. Sounds like the oil sludge answer has been largely explored to unlikeliness.
As a side note, I've heard of old school bin ball machine service techs shorting out the fuses, and bumping up the system voltage to burn out any weak components. This is to avoid frequent service calls. Puts them through their paces to keep them running reliably. Not suggesting anybody doing this, it's just what I think of when doing the nitrogen sniffer test.
|
|
|
|
Post by turbokinetic on Jul 2, 2018 5:57:29 GMT
I'm not sure if any of the other members would agree, but the added nitrogen (after most of the r12 has been removed), helps bump the pressure up and force the refrigerant through small, hard to find leaks. Of course you don't want crazy high pressures or you could rupture something. Maybe it's so small that it can't be found. I only recommend this method if you're troubles occur again in a few weeks time after charging to proper operation. Sounds like the oil sludge answer has been largely explored to unlikeliness. As a side note, I've heard of old school bin ball machine service techs shorting out the fuses, and bumping up the system voltage to burn out any weak components. This is to avoid frequent service calls. Puts them through their paces to keep them running reliably. Not suggesting anybody doing this, it's just what I think of when doing the nitrogen sniffer test. That's a great idea about using N2 under pressure to drive the remaining R12 out through any potential leak path. I believe that they will say on the unit what the low side test pressure was at the factory. I would think that would be a safe test pressure for the components, don't you?
LOL at the pinball techs. That sounds like some of the people I have worked with....
|
|